With the addition of the save/load system, our roguelike framework is almost complete. In this part, we’re going to add the last two major pieces of our game’s foundation: the generic Entity and the Map.
Let’s look at the architecture of the Entity, Map, and their supporting classes:
Note: I didn’t explicitly call it out in part 2, but I use Unified Markup Language (UML) notation for my architecture diagrams. For those who are interested in what the different symbols mean, I’ve added links to information about UML to the References at the bottom of the page.
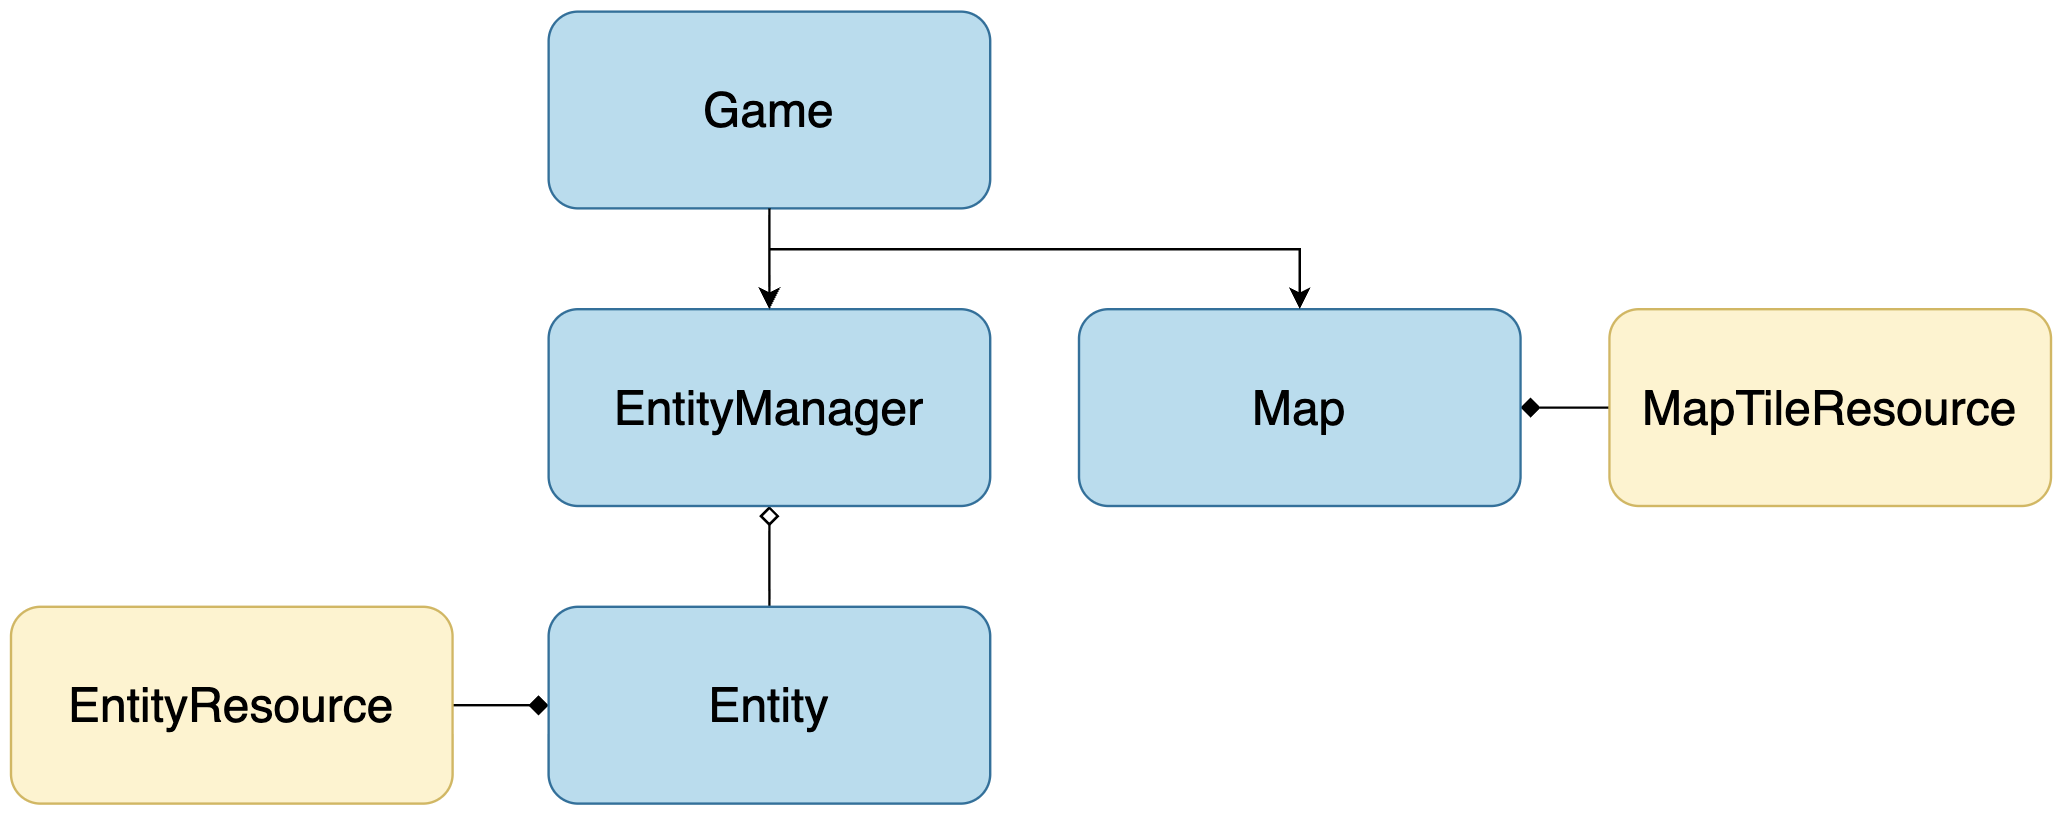
Our Player is currently represented by a Sprite2D attached directly to the Game node. The Player won’t exist in isolation, though; we’re going to want to add monsters, items, and any other entities we can think of, as well. We’re going to use Godot’s Resource system to take a data-driven approach to defining our game entities by creating an EntityResource. The EntityResource will store the underlying data for everything that exists in our game world, animate and inanimate. EntityResources will be attached to an Entity node class, which will handle the display and interaction logic between entities. To manage the Entity node lifecycle, we’ll create an EntityManager as a child of the Game node. Actions will be able to access the EntityManager through the Game reference passed to the Action -> execute() method.
The action in our game will take place on the Map, a child node of the Game. The Map is essentially a container for tiles and helper methods, and much like the EntityResource, we’ll create a MapTileResource to store the relevant tile data.
The code for this part can be found at https://github.com/alexshopov/godot-roguelike-basic-set/tree/part-3.
The Constants Autoload
Before creating our Entity, we’re going to create a new autoload script to hold constant values we need to access from various parts of the game.
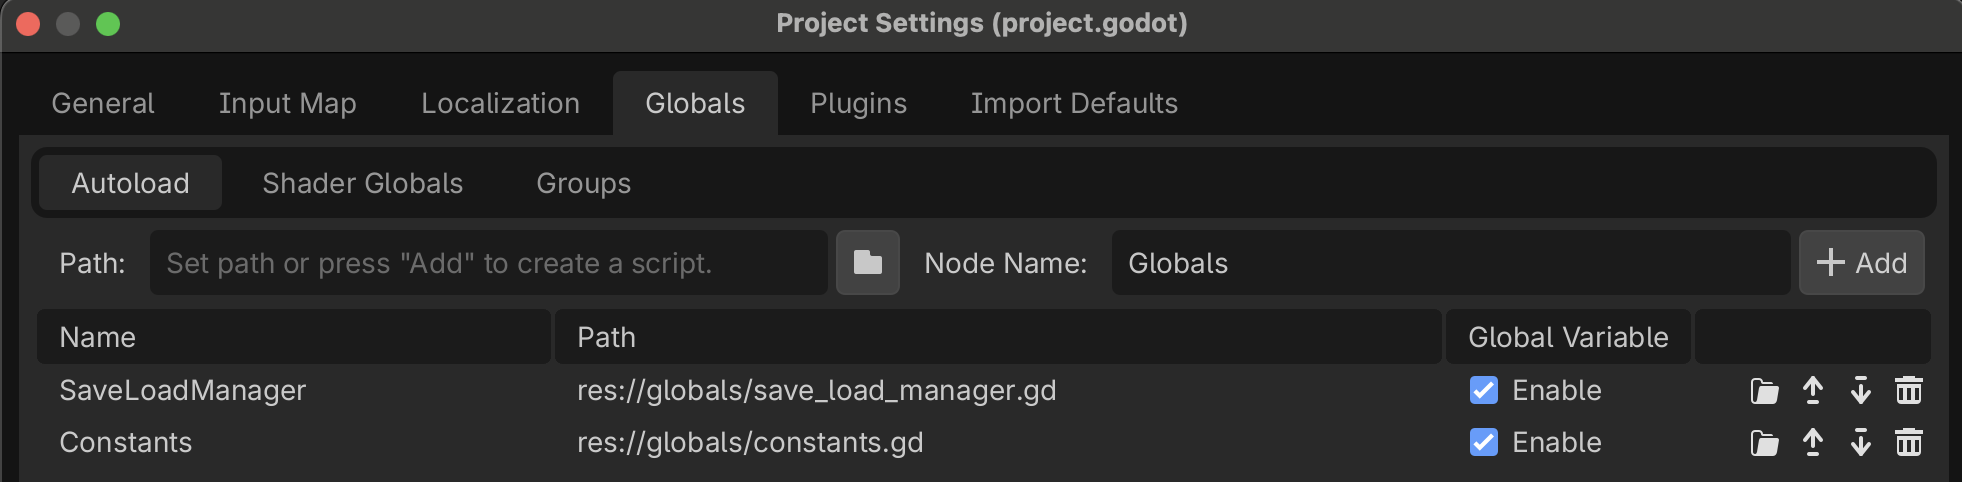
Open Project Settings -> Globals and add a new global node called Constants. Save Constants in the globals directory.
We’re going to move the TILE_SIZE constant from game/game.gd to globals/constants.gd. Add the following line to globals/constants.gd:
extends Node+ const TILE_SIZE := 16+ const TILE_SIZE_VECTOR := Vector2(16, 16)
Remove the corresponding line from game/game.gd:
class_name Gameextends Nodeconst GAME_SIZE := Vector2(40, 22)- const TILE_SIZE := Vector2i(16, 16)
EntityResources
Create a new directory called entities.
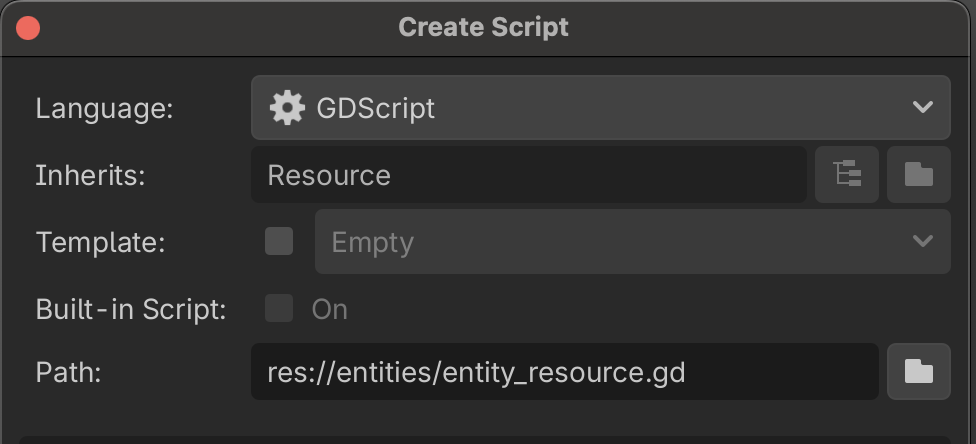
Create a new script in the entities directory called entity_resource.gd. entity_resource.gd should inherit from Resource instead of Node:
Open entity_resource.gd and add the following code:
class_name EntityResourceextends Resource@export var atlas_texture : AtlasTexture@export var draw_layer : int = 1
EntityResource contains an atlas_texture to hold our sprite data, as well as a draw_layer upon which the entity will be rendered. We’ll give draw_layer a default value of 1 to ensure that our Entities are always drawn on top of the background.
Create a data directory. Add an entities directory to the data directory.
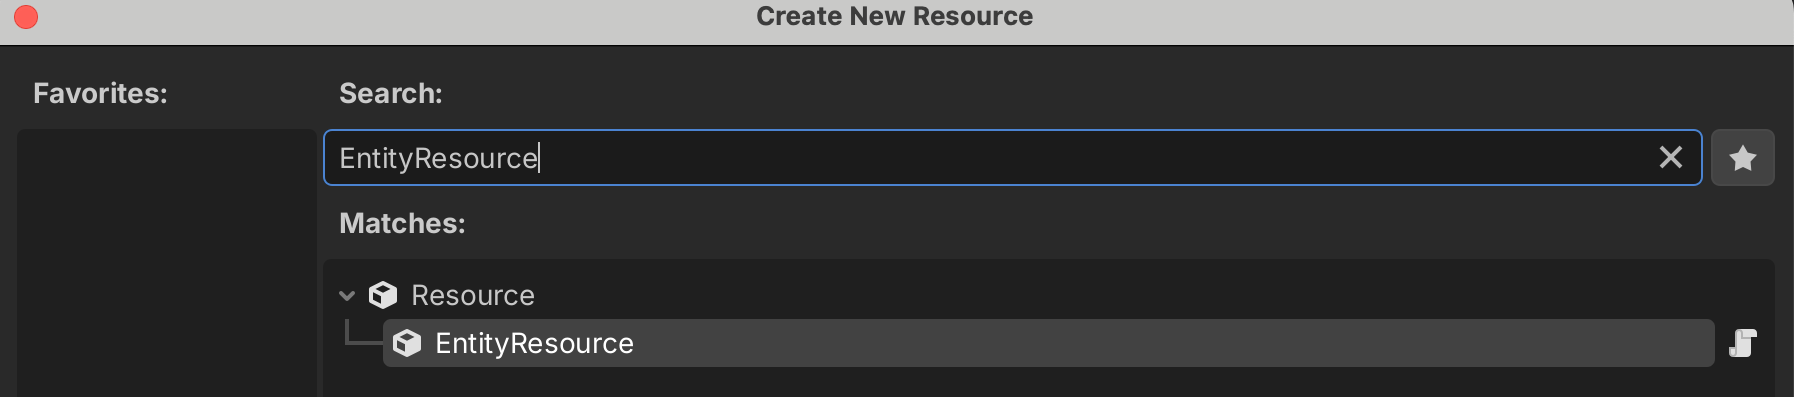
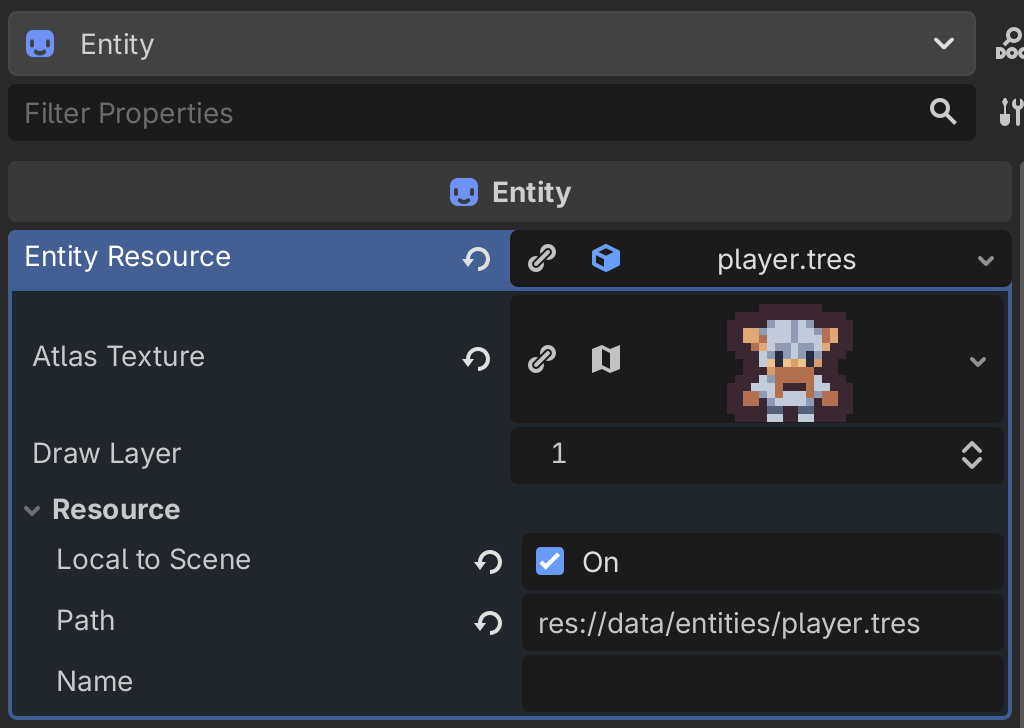
Right-click on data/entities and select Create New -> Resource. Select EntityResource in the Create New Resource dialog.
Name the new resource player.tres and save it in the data/entities directory.
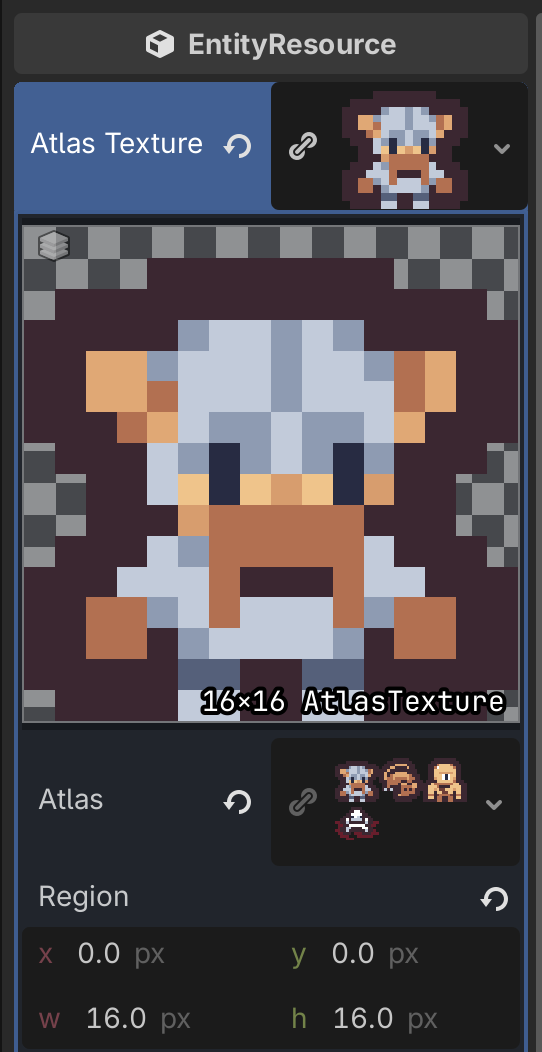
Double-click player.tres to open the resource inspector.
Create a new Atlas Texture.
Just as we did in Part 1, drag assets/spritesheets/unit_spritesheet.png into the Atlas Texture -> Atlas field.
Our unit_spritesheet is laid out as a 3 x 2 grid of 16 x 16 sprites. Set Atlas Texture -> Region -> w and h to 16 x 16.
The Player sprite is located at grid position (0, 0), so we don’t need to do anything else for this EntityResource.
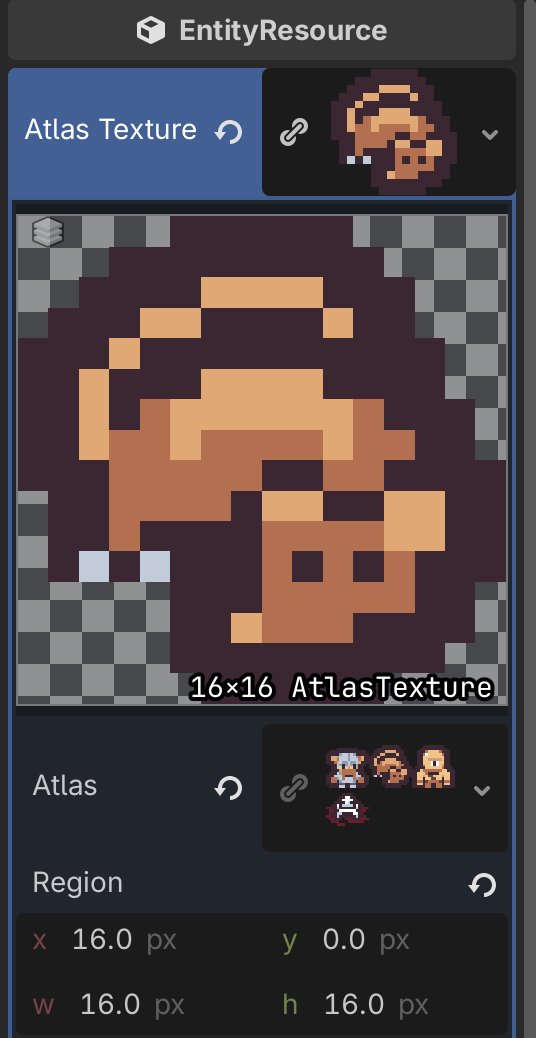
Duplicate player.tres and name the new copy npc.tres.
Open npc.tres and set the AtlasTexture -> Region -> x to 16. You should see the rat sprite displayed in the texture area.
The Entity
Right-click on the Player node in the Game scene and select Save Branch as Scene.... Name it entity.tscn and save it in the entities directory.
Open entity.tscn and rename the node from Player to Entity. Attach a new script to the Entity node and add the following code:
@toolclass_name Entityextends Sprite2D@export var entity_resource : EntityResourcefunc _ready() -> void: assert(entity_resource != null, "An entity_resource must be specified before adding the Entity to scene.") _load_resource()func move(position_offset: Vector2i) -> void: global_position += Vector2(position_offset * Constants.TILE_SIZE)func save() -> Dictionary: return { "position": var_to_str(global_position), "entity_resource": entity_resource.resource_path }func load(save_data: Dictionary) -> void: var res: String = _load_property(save_data, "entity_resource") if res: _load_resource(res) var player_position: String = _load_property(save_data, "position") if player_position: global_position = str_to_var(player_position)func _load_property(save_data: Dictionary, property: String) -> Variant: var prop: Variant = save_data.get(property) if prop == null: print("Load Error: error parsing entity.%s" % property) return null return propfunc _load_resource(resource_path: String = "") -> void: if resource_path: entity_resource = ResourceLoader.load(resource_path) texture = entity_resource.atlas_texture z_index = entity_resource.draw_layer
We’re going to extend the Sprite2D class to create our entities. The EntityResource is declared as an @export variable so we can easily set a default in the Godot editor.
class_name Entityextends Sprite2D@export var entity_resource : EntityResource
As the Entity class is meaningless without an EntityResource, the Entity node’s _ready function will first verify that an EntityResource exists before the Entity is added to the scene. We’ll then call the _load_resource helper method, as described below.
func _ready() -> void: assert(entity_resource != null, "An entity_resource must be specified before adding the Entity to scene.") _load_resource()
We next define a move method that we can later call from the MovementAction. This will allow the Entity to be fully responsible for handling its own rendering logic.
func move(position_offset: Vector2i) -> void: global_position += Vector2(position_offset * Constants.TILE_SIZE)
Next we’ll handle saving and loading our core Entity data.
func save() -> Dictionary: return { "position": var_to_str(global_position), "entity_resource": entity_resource.resource_path }func load(save_data: Dictionary) -> void: var res: String = _load_property(save_data, "entity_resource") if res: _load_resource(res) var player_position: String = _load_property(save_data, "position") if player_position: global_position = str_to_var(player_position)func _load_property(save_data: Dictionary, property: String) -> Variant: var prop: Variant = save_data.get(property) if prop == null: print("Load Error: error parsing entity.%s" % property) return null return prop
Finally, we implement a _load_resource helper method which sets the Entity attributes defined in the EntityResource. This method takes a resource path as an optional parameter, and loads that resource if the path is specified. We don’t need to specify a resource_path when this method is called in the _ready function as the Entity node include a default entity_resource in the @export variable, but you’ll see that we do pass a resource_path when we load player data.
func _load_resource(resource_path: String = "") -> void: if resource_path: entity_resource = ResourceLoader.load(resource_path) texture = entity_resource.atlas_texture z_index = entity_resource.draw_layer
When you have implemented the entity.gd code, go back to the Godot editor and load data/entities/player.tres into the Player -> Entity Resource field.
The EntityManager
In part 1 we explicitly added the Player to the Game scene tree. Moving forward, we’re going to handle the entire Entity lifecycle programmatically using an EntityManager node.
Add a new script called entity_manager to the entities directory. Add the following code to entity_manager.gd:
class_name EntityManagerextends Nodeconst ENTITY_SCENE : PackedScene = preload("res://entities/entity.tscn")const ENTITY_RESOURCES : Dictionary[String, EntityResource] = { "player": preload("res://data/entities/player.tres"), "npc": preload("res://data/entities/npc.tres")}var player : Entityvar npc : Entityfunc init(origin: Vector2i) -> void: player = _spawn_entity(ENTITY_RESOURCES.get("player")) player.global_position = origin * Constants.TILE_SIZE npc = _spawn_entity(ENTITY_RESOURCES.get("npc")) npc.global_position = (origin + Vector2i(5, 0)) * Constants.TILE_SIZEfunc _spawn_entity(entity_resource: EntityResource = null) -> Entity: var new_entity := ENTITY_SCENE.instantiate() if entity_resource: new_entity.entity_resource = entity_resource add_child(new_entity) return new_entityfunc save() -> Dictionary: var save_data: Dictionary = {} save_data.set("player", player.save()) save_data.set("npc", npc.save()) return save_datafunc load(save_data: Dictionary) -> void: player.load(save_data.get("player")) npc.load(save_data.get("npc"))
We start by preloading the Entity scene and EntityResources, then declaring our player and npc.
const ENTITY_SCENE : PackedScene = preload("res://entities/entity.tscn")const ENTITY_RESOURCES : Dictionary[String, EntityResource] = { "player": preload("res://data/entities/player.tres"), "npc": preload("res://data/entities/npc.tres")}var player : Entityvar npc : Entity
We then create an initialization method and Entity spawn method. The _spawn_entity method takes an optional EntityResource as a parameter. We’ll use this to explicitly specify what type of Entity we’re creating in the init method, but you’ll see how below that we’ll leave this blank when we load existing Entity data.
func init(origin: Vector2i) -> void: player = _spawn_entity(ENTITY_RESOURCES.get("player")) player.global_position = origin * Constants.TILE_SIZE npc = _spawn_entity(ENTITY_RESOURCES.get("npc")) npc.global_position = (origin + Vector2i(5, 0)) * Constants.TILE_SIZEfunc _spawn_entity(entity_resource: EntityResource) -> Entity: var new_entity := ENTITY_SCENE.instantiate() if entity_resource: new_entity.entity_resource = entity_resource add_child(new_entity) return new_entity
The EntityManager will be responsible for saving and loading the Entities in the scene. We only have two entities in our scene at the moment, so we can explicitly save and load them to establish our save/load pattern. These methods will evolve considerably as more entities are added to the scene.
func save() -> Dictionary: var save_data: Dictionary = {} save_data.set("player", player.save()) save_data.set("npc", npc.save()) return save_datafunc load(save_data: Dictionary) -> void: player.load(save_data.get("player")) npc.load(save_data.get("npc"))
Delete the Player node from the Game scene, then add the EntityManager node to the scene as a child of the Game node. Open game/game.md and make the following updates to remove the Player and add the EntityManager:
class_name Gameextends Nodeconst GAME_SIZE := Vector2i(40, 22)- const TILE_SIZE := Vector2i(16, 16)+ @onready var entity_manager : EntityManager = $EntityManager- @onready var player : Sprite2D = $Playerfunc _ready() -> void: print("Welcome to the dungeon.") @warning_ignore("integer_division") var center := GAME_SIZE / 2- player.global_position = center * TILE_SIZE+ entity_manager.init(center)
Open actions/movement_action.gd and make the following change to accommodate the player’s new position in the scene tree:
func execute(game: Game) -> void:- game.player.move(offset)+ game.entity_manager.player.move(offset)
Finally, open globals/save_load_manager.gd and make the following changes to account for the Entity handling its own save and load operations:
extends Nodeconst SAVE_FILENAME := "user://savegame.json"- const PLAYER_POSITION := "player_position"+ const PLAYER_DATA := "player"func save(game: Game) -> void: var save_data := {- PLAYER_POSITION: var_to_str(game.player.global_position)+ PLAYER_DATA: game.entity_manager.player.save() } var json_str := JSON.stringify(save_data) var file := _open_file(FileAccess.WRITE) if not file: return file.store_string(json_str) print("Game saved successfully.")func load(game: Game) -> void: var file := _open_file(FileAccess.READ) if not file: return var json_str := file.get_line() var save_data := JSON.parse_string(json_str) as Dictionary if not save_data: print("Error parsing saved data.") return- var player_position: String = save_data.get(PLAYER_POSITION)- if not player_position:- print("Error parsing player_position.")- return- game.player.global_position = str_to_var(player_position)+ game.entity_manager.player.load(save_data.get(PLAYER_DATA)) print("Game loaded.")func _open_file(flags: FileAccess.ModeFlags) -> FileAccess: var file := FileAccess.open(SAVE_FILENAME, flags) if not file: var err := FileAccess.get_open_error() print("Failed to open %s. Error: %s" % [SAVE_FILENAME, error_string(err)]) return null return file
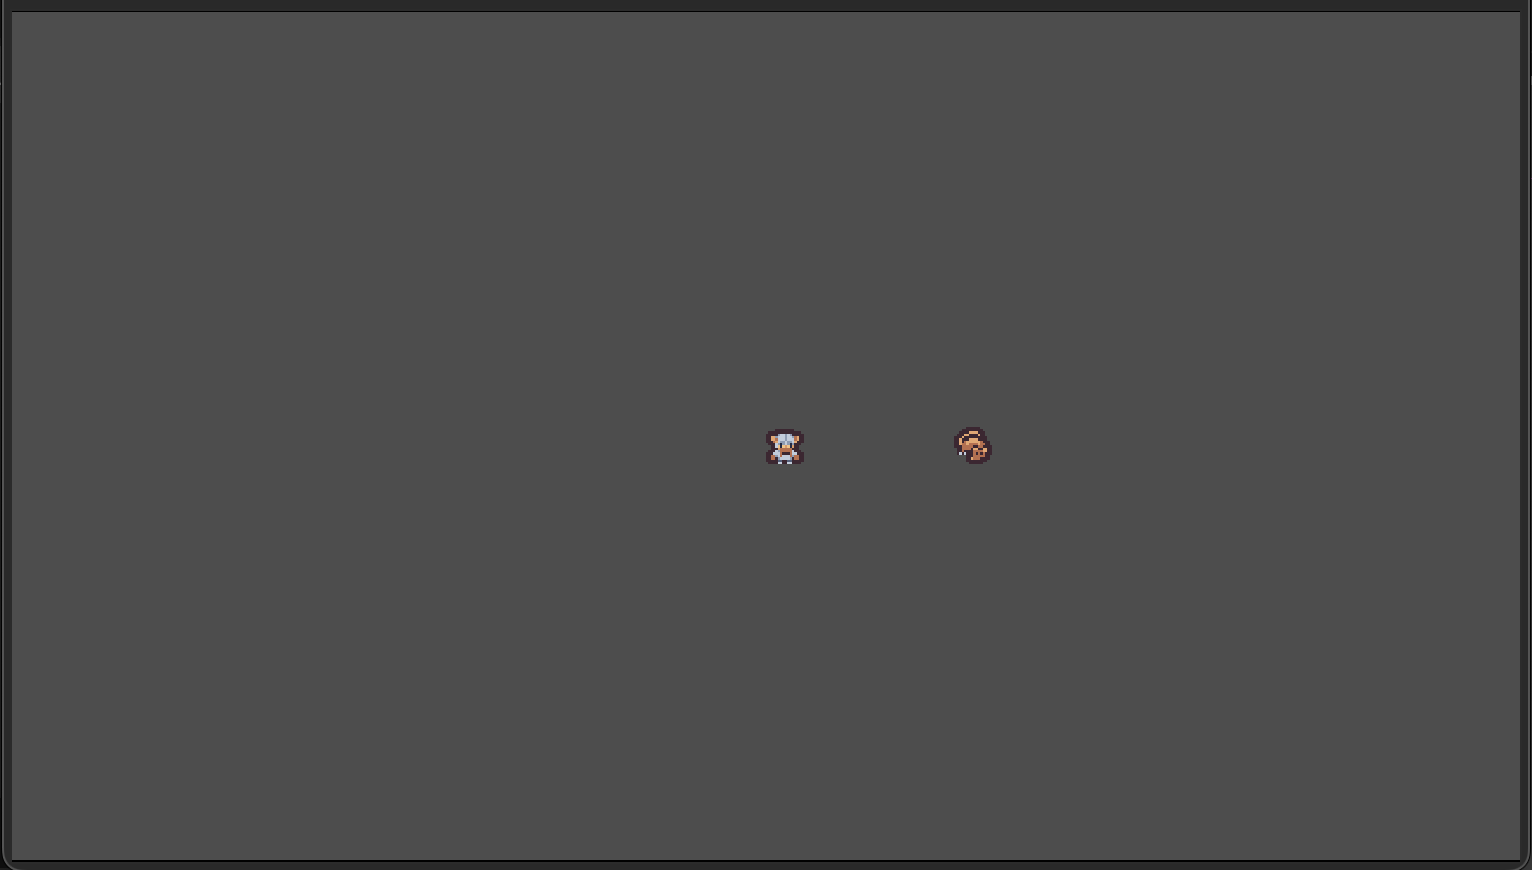
Run the game and you should see our player and npc rendered with the appropriate sprites. Move around, test saving and loading, and confirm that Godot isn’t throwing any errors.
The Map and MapTileResource
With a well defined system for adding Entities to our scene, it’s time to establish the basis of our game world. Procedural map generation will have to wait until part 4, there is some preliminary work we need to do first. We’ll start by defining our map tile data model.
Create a new directory called map. Add a new script inherited from Resource and name it map_tile_resource.gd. Add the following code:
class_name MapTileResourceextends Resource@export var walkable : bool@export var transparent : bool@export var atlas_coord : Vector2i
Our map tiles declares two flags: walkable defines whether or not the player can move through a tile, while transparent defines if a tile blocks line of sight. We’ll come back to this in part 5 when we implement Field of View. The atlas_coord property defines which dungeon_tiles_spritesheet.png sprite to render.
Just as we did for the player.tres and npc.tres resources, we need to create a set of MapTileResources. Add a map_tiles directory to the data directory and create three new MapTileResources: floor_1.tres, floor_2.tres, and wall.tres.
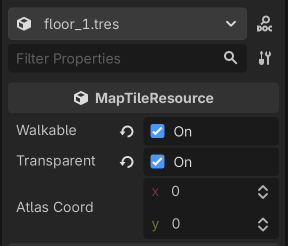
Open floor_1.tres. Set walkable and transparent to true.
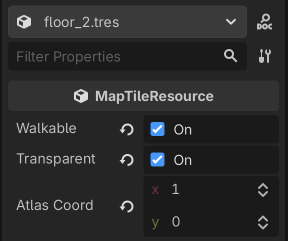
Open floor_2.tres. Set walkable and transparent to true, then set atlas_coord to (1, 0)
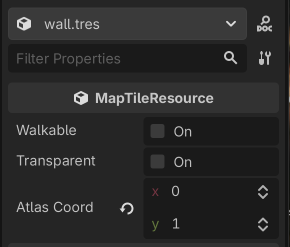
Open wall.tres. Set atlas_coord to (0, 1)
We’re going to represent our dungeon using a TileMapLayer 4 and TileSet 5. Add a new TileMapLayer as a child of Game and rename it Map.
In the inspector create a new TileMapLayer -> Tile Set. The default tile size is conveniently 16 x 16, so we don’t need to modify anything else here.
At the bottom of the Godot editor you should see a new tab called TileSet (if you don’t see this tab, make sure the Map node is selected). Click on the TileSet tab.
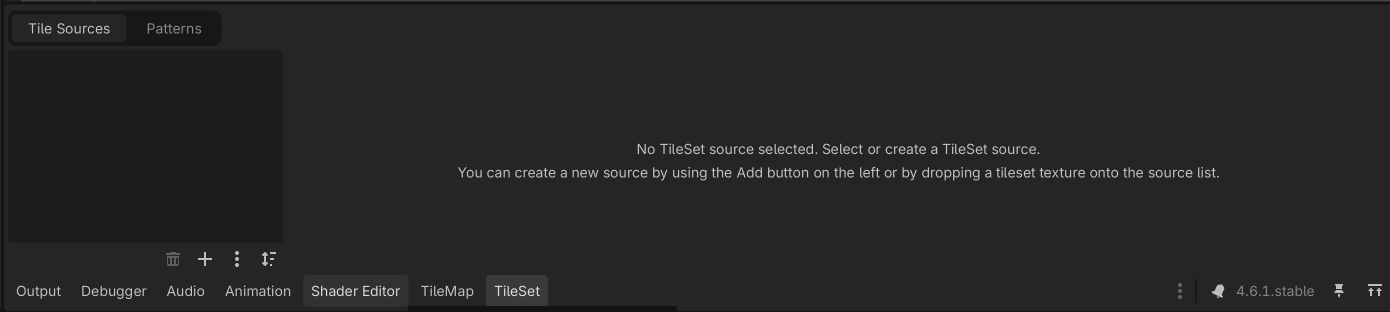
Drag the assets/spritesheets/dungeon_tiles_spritesheet into the empty Tile Sources box. A pop will appear and ask if you would like Godot to automatically create the tiles in the atlas. Click Yes. You should see the dungeon_tiles_spritesheet loaded into the Tile Sources, and each tile outlined in the tile atlas.
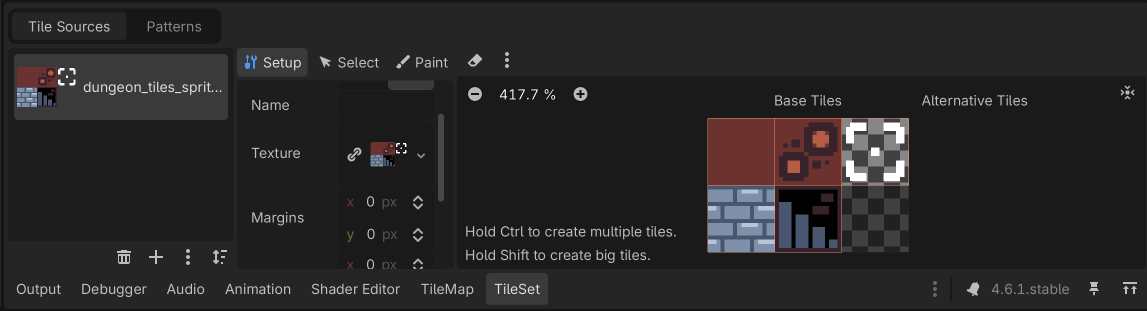
Attach a new script to Map and add the following code:
class_name Mapextends TileMapLayerconst MAP_TILE_RESOURCES := { "floor_1": preload("res://data/map_tiles/floor_1.tres"), "floor_2": preload("res://data/map_tiles/floor_2.tres"), "wall": preload("res://data/map_tiles/wall.tres")}var map_size : Vector2ivar tiles : Dictionary[Vector2i, MapTileResource] = {}@onready var source_id := tile_set.get_source_id(0)func init(new_map_size: Vector2i) -> void: map_size = new_map_size for x: int in range(map_size.x): for y: int in range(map_size.y): var tile := Vector2i(x, y) var tile_resource: MapTileResource if randf() < 0.85: tile_resource = MAP_TILE_RESOURCES.get("floor_1") else: tile_resource = MAP_TILE_RESOURCES.get("floor_2") tiles.set(tile, tile_resource) set_cell(tile, source_id, tile_resource.atlas_coord) for x: int in range(10, 15): var tile := Vector2i(x, 8) var tile_resource: MapTileResource = MAP_TILE_RESOURCES.get("wall") tiles.set(tile, tile_resource) set_cell(tile, source_id, tile_resource.atlas_coord)func tile_to_global(tile: Vector2i) -> Vector2: return map_to_local(tile) - Constants.HALF_TILE_SIZE_VECTORfunc global_to_tile(global: Vector2) -> Vector2i: return local_to_map(global) func is_in_bounds(tile: Vector2i) -> bool: return tiles.has(tile)func is_walkable(tile: Vector2i) -> bool: return is_in_bounds(tile) and tiles[tile].walkable
Just as we did in the EntityManager, we’ll start by preloading the MapTileResources that will be used to define our map.
class_name Mapextends TileMapLayerconst MAP_TILE_RESOURCES := { "floor_1": preload("res://data/map_tiles/floor_1.tres"), "floor_2": preload("res://data/map_tiles/floor_2.tres"), "wall": preload("res://data/map_tiles/wall.tres")}
We then define a map_size variable, and dictionary to hold our map tile resources. Rather than use a flat or two-dimensional array, we’ll use a dictionary keyed to the (x, y) position of each tile allowing us to easily correlate entity positions with map tiles at those positions. This will pay dividends when we implement area affect spells later on.
var map_size : Vector2ivar tiles : Dictionary[Vector2i, MapTileResource] = {}
The source_id specifies which TileSet we’re using.
@onready var source_id := tile_set.get_source_id(0)
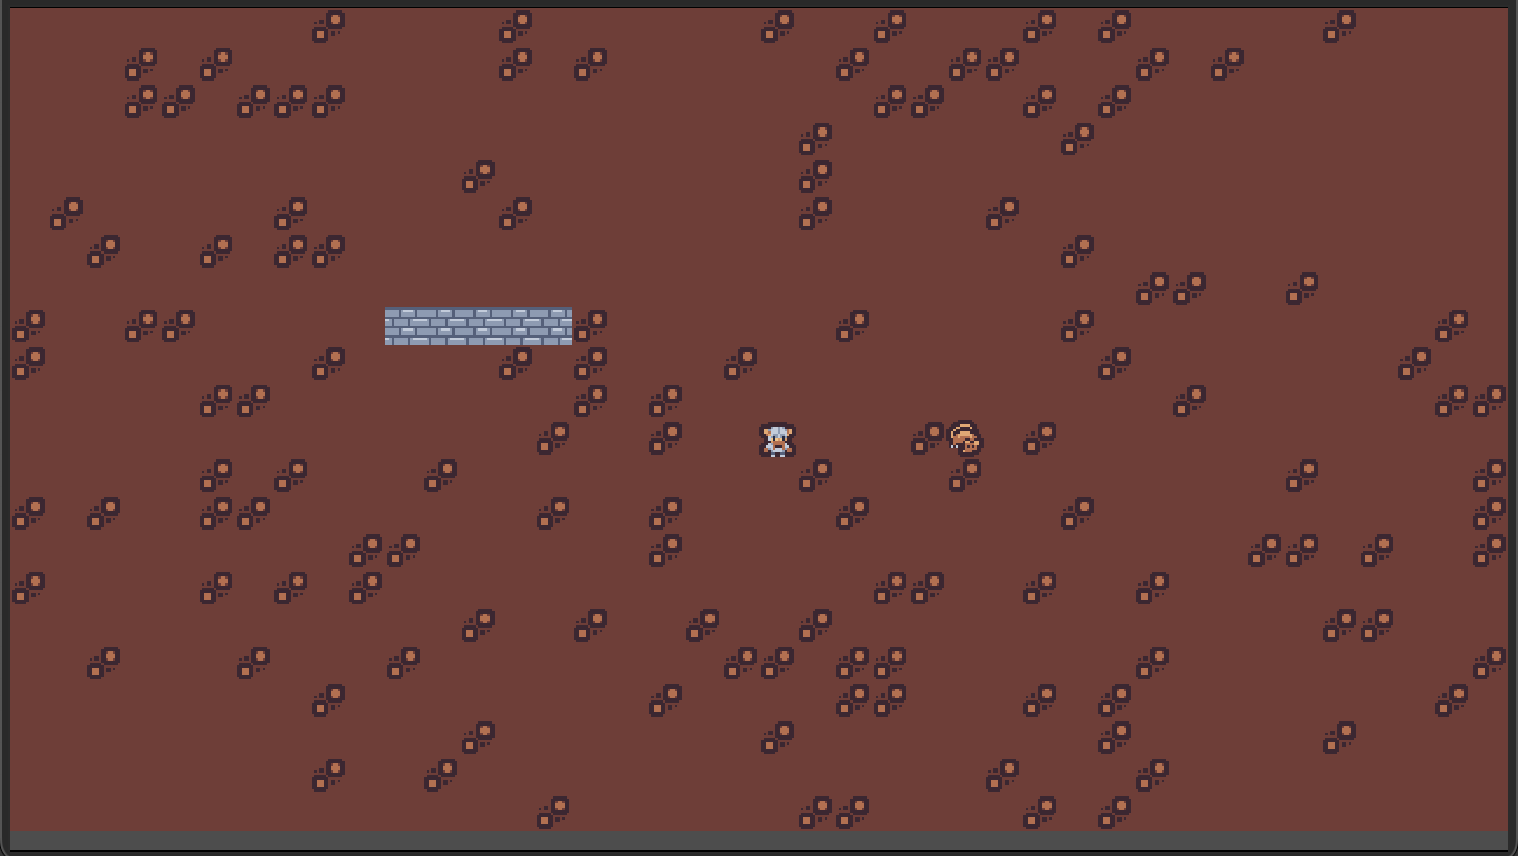
The init function is where the map is actually built. We iterate over the width and height of the map, creating a new TileMapResource at each position. Recall that we specified two different floor tile resources, one solid color, the other with some stonework. To make things more visually interesting, we implement a conditional that checks a random value between 0.0 – 1.0. If the random value is greater than 0.85, we set the tile resource to the stone work tile.
func init(new_map_size: Vector2i) -> void: map_size = new_map_size for x: int in range(map_size.x): for y: int in range(map_size.y): var tile := Vector2i(x, y) var tile_resource: MapTileResource if randf() < 0.85: tile_resource = MAP_TILE_RESOURCES.get("floor_1") else: tile_resource = MAP_TILE_RESOURCES.get("floor_2") tiles.set(tile, tile_resource) set_cell(tile, source_id, tile_resource.atlas_coord)
After creating the ground tiles, we’ll create a small wall, four tiles wide.
	for x: int in range(10, 15):
		var tile := Vector2i(x, 8)
		var tile_resource: MapTileResource = MAP_TILE_RESOURCES.get("wall")
		tiles.set(tile, tile_resource)
		set_cell(tile, source_id, tile_resource.atlas_coord)
After initializing the map, we have a series of helper methods. These methods will allow us to easily convert global viewport coordinate to map coordinates to global viewport coordinate and vice versa, as well as return information about the attributes of a specified tile.
func tile_to_global(tile: Vector2i) -> Vector2: return map_to_local(tile) func global_to_tile(global: Vector2) -> Vector2i: return local_to_map(global) func is_in_bounds(tile: Vector2i) -> bool: return tiles.has(tile)func is_walkable(tile: Vector2i) -> bool: return is_in_bounds(tile) and tiles[tile].walkable
TODO: save/load map
With the Map script implemented, make the following updates to game/game.gd:
class_name Gameextends Nodeconst GAME_SIZE := Vector2i(40, 22)+ @onready var map : Map = $Mapfunc _ready() -> void: print("Welcome to the dungeon.")+ map.init(GAME_SIZE) @warning_ignore("integer_division") var center := GAME_SIZE / 2 entity_manager.init(center)
Finally, open actions/movement_action.gd and make the following changes. We’re now able to query the map and check if the tile our player wants to move onto is actually within the map bounds and not blocked by a wall.
func execute(game: Game) -> void:- game.entity_manager.player.global_position += Vector2(offset * game.TILE_SIZE)+ var map := game.map+ var player := game.entity_manager.player+ var new_tile:= map.global_to_tile(player.global_position) + offset+ if map.is_in_bounds(new_tile) and map.is_walkable(new_tile):+ game.entity_manager.player.move(offset)
Run the game and confirm that the player can’t move through the wall, and test saving and loading.
That was a lot. Hopefully you’re starting to see the power of the data and component driven approach to roguelike development Godot allows us to take.
Get up, take a deep breath, walk around, and hydrate. In the next part we’ll implement procedural dungeon generation.
References
UML Introduction: https://www.geeksforgeeks.org/system-design/unified-modeling-language-uml-introduction/
UML Tutorial: https://www.visual-paradigm.com/guide/uml-unified-modeling-language/uml-class-diagram-tutorial/
Atlas Texture: https://docs.godotengine.org/en/stable/classes/class_atlastexture.html
TileMapLayer: https://docs.godotengine.org/en/stable/classes/class_tilemaplayer.html
Using TileSets: https://docs.godotengine.org/en/stable/tutorials/2d/using_tilesets.html
